Velder's Hallucination: Difference between revisions
IceSoulMOG (talk | contribs) No edit summary |
IceSoulMOG (talk | contribs) No edit summary |
||
| Line 8: | Line 8: | ||
| Quotation=Joaquin's trap is elaborately prepared. '''Velder's Hallucination''' is a place where you cannot wake up from your dream. | | Quotation=Joaquin's trap is elaborately prepared. '''Velder's Hallucination''' is a place where you cannot wake up from your dream. | ||
| Description=A hallucination of the Glitter Alchemist Joaquin. You may be forever lost in the hallucination. | | Description=A hallucination of the Glitter Alchemist Joaquin. You may be forever lost in the hallucination. | ||
| LvNeed=60- | | LvNeed=60-80 | ||
| LvFit | | LvFit=90 | ||
| XEntryReq=<span style="display:none">{{</span> | | XEntryReq=<span style="display:none">{{</span> | ||
*Complete all dungeons in Velder on Very Hard. | *Complete all dungeons in Velder on Very Hard. | ||
*Have | *Have 2 Luto's Passes [[File:HQ_Shop_Item_113277.png|50px]] in your inventory. | ||
*Must be Level 60 or higher. | *Must be Level 60 or higher. | ||
<span style="display:none">}}</span> | <span style="display:none">}}</span> | ||
| Mob=<span style="display:none">{{</span> | | Mob=<span style="display:none">{{</span> | ||
|[[File:Bloody_Glitter_Spearman.jpg|60px]] | |[[File:Bloody_Glitter_Spearman.jpg|60px]] | ||
|'''Bloody Glitter Spearman''' - This is a stronger variant of the '''Glitter Guard''' that you have encountered throughout Velder. | |'''Bloody Glitter Spearman''' - This is a stronger variant of the '''Glitter Guard''' that you have encountered throughout Velder. | ||
| Line 97: | Line 87: | ||
==Mob Potions== | ==Mob Potions== | ||
Most '''Bloody Glitter''' monsters (Except Bloody Glitter Bomber) are capable of drinking potions whenever their health reaches about | Most '''Bloody Glitter''' monsters (Except Bloody Glitter Bomber) are capable of drinking potions whenever their health reaches about 60%. In Luto Mode, they will drink their potions at 70% HP. After drinking their potions, they will receive various effects. | ||
<br> | <br> | ||
-'''Red Smoke''' - Increasing their size and 100% critical chance. | -'''Red Smoke''' - Increasing their size and 100% critical chance. | ||
| Line 120: | Line 110: | ||
|[[File:Joaquin.jpg|60px]] | |[[File:Joaquin.jpg|60px]] | ||
|'''Joaquin''' - Will create obstacles that do damage and block your path. He can throw '''Puppet Stones''' onto the field and create portals to uplift buildings from the ground or drop them from the air. | |'''Joaquin''' - Will create obstacles that do damage and block your path. He can throw '''Puppet Stones''' onto the field and create portals to uplift buildings from the ground or drop them from the air. | ||
|- | |- | ||
|[[File:Demoniac_Cannon.jpg|60px]] | |[[File:Demoniac_Cannon.jpg|60px]] | ||
|'''Demoniac Cannon''' - This is a same variant of the '''Demoniac Cannon''' that you have encountered throughout Velder. | |'''Demoniac Cannon''' - This is a same variant of the '''Demoniac Cannon''' that you have encountered throughout Velder. | ||
<span style="display:none">}}</span> | <span style="display:none">}}</span> | ||
| Boss=<span style="display:none">{{</span> | | Boss=<span style="display:none">{{</span> | ||
| Line 170: | Line 154: | ||
*Knock him down to 25 life bars so he heals himself, then continue to attack him until he is at 25 life bars again and miniaturizes himself. At this point everyone should unload all of their strongest skills on him at once to kill him before he reverts to his original size and heals. | *Knock him down to 25 life bars so he heals himself, then continue to attack him until he is at 25 life bars again and miniaturizes himself. At this point everyone should unload all of their strongest skills on him at once to kill him before he reverts to his original size and heals. | ||
**Do not knock him below 24 bars for this as that might trigger his next healing threshold instead. | **Do not knock him below 24 bars for this as that might trigger his next healing threshold instead. | ||
*Disregard the game's declaration to quickly attack Joaquin during his healing to break his shield, rest assured that any attempt to break it is futile after the Hunting Fields patch and so it is best to not waste MP on skills. Instead now is a good time to build MP, awakening charge, and recover HP. | *Disregard the game's declaration to quickly attack Joaquin during his healing to break his shield, rest assured that any attempt to break it is futile after the Hunting Fields patch and so it is best to not waste MP on skills. Instead now is a good time to build MP, awakening charge, and recover HP. | ||
*Keep an eye out for Hallucination\Puppet Debuff and do not attack until it is clear no one sees you under its effect even if you do not see yourself under its effect. | *Keep an eye out for Hallucination\Puppet Debuff and do not attack until it is clear no one sees you under its effect even if you do not see yourself under its effect. | ||
Revision as of 08:21, 10 October 2015

Velder's Hallucination
| “ | Joaquin's trap is elaborately prepared. Velder's Hallucination is a place where you cannot wake up from your dream.
|
” |

- Complete all dungeons in Velder on Very Hard.
- Have 2 Luto's Passes
 in your inventory.
 - Must be Level 60 or higher.

| Monster Image | Monster Description | Monster Moves |
|---|---|---|

|
Bloody Glitter Spearman - This is a stronger variant of the Glitter Guard that you have encountered throughout Velder. | |

|
Bloody Glitter Sniper - This is a stronger variant of the Glitter Sniper that you have encountered throughout Velder. They're now capable to use Backflip Shot after a shot. | |

|
Bloody Glitter Defender - This is a stronger variant of the Glitter Defender that you have encountered throughout Velder. When they attack with their shields, spikes will appear from them. They are now capable of reflecting projectiles with their shields whenever they are defending. | |

|
Bloody Glitter Dasher - This is a stronger variant of the Glitter Dasher that you have encountered throughout Velder. | |

|
Bloody Wyvern - This is a stronger variant of the Wyverns that you have encountered throughout Velder. | |

|
Bloody Uno Hound - This is a smaller variant of Uno Hound. It will use the same moves that the regular Uno Hound will and possesses much more attack speed. | |

|
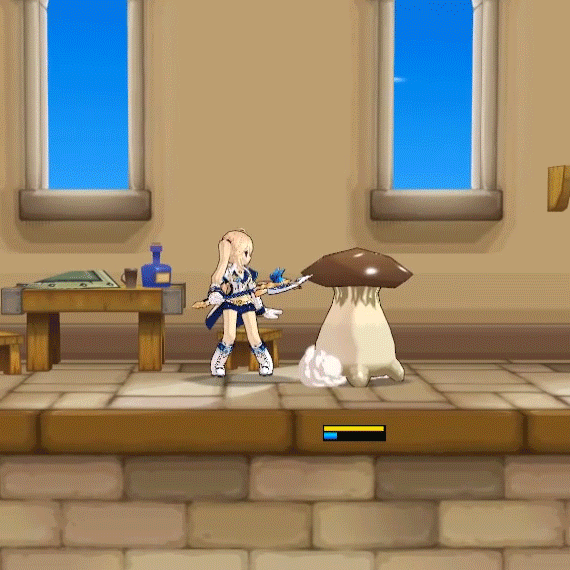
Puppet Stone - These are the red puppets that you have encountered when you fought against Crazy Puppet. These puppets will move around and try to get close to you. When they are close, they will dance a little and explode, damaging players close to it and killing itself. | |

|
Bloody Glitter Bomber - This is a stronger variant of the Glitter Rock Thrower. But instead of rocks, this Glitter holds a case full of bombs on their back and is no longer immobile. | |

|
Joaquin's Hallucination (Crazy Puppet) - During this stage, you will encounter Crazy Puppet as a hallucination. It will attack only with its staff by swinging it in front or behind it, leaving a field of fire behind after swinging. | |

|
Puppet Stones will be summoned in large numbers by these and if these puppets dance near it, it will regain HP. | |

|
Bloody Glitter Assassin - This is a stronger variant of the Arc Glitter Assassins that you have encountered throughout Velder. They are now capable of using Shadow Step with Shadow Piercing along with their regular attacks. | |

|
Zombie Glitter - As the name would suggest, this is a reanimated Glitter corpse. They will slowly move towards any player and attack by biting them. | |

|
Zombie Glitter Grave - Produces one Zombie Glitter at a time until destroyed, has an extremely large amount of HP.
| |

|
Bloody Spear Glitter - This is one of the Elite Glitter that you will encounter. These Elite Glitters are now stronger and use Raven's combo that you have encountered in Altera. In addition to being able to pull off Raven's sword combos, they can also use Power Assault and Charged Bolt - Hedgehog in the same style whenever they have the appropriate amount of mana. | |

|
Bloody Sniper Glitter - This is the second Elite Glitter that you will encounter. Unlike the Bloody Glitter Sniper, these archers will be wearing green armor. These archers are now stronger and are able to use Rena's pre-rebalance combos of firing arrows. In addition to being able to shoot arrows like Rena, they can also use Assault Kick and Perfect Storm in the same style whenever they have the appropriate amount of mana. | |

|
Bloody Magic Glitter - This is the third Elite Glitter that you will encounter. Instead of shooting ghosts from their wands, they can shoot fireballs in the same method as Aisha. In addition to being able to shoot fireballs like Aisha, they can also use Chain Fireball and Gust Screw in the same style whenever they have the appropriate amount of mana.
|
| Monster Image | General Description | General Moves |
|---|---|---|

|
Awakened Bloody Spear Glitter - These Elite Glitters are now stronger and use Raven's combo that you have encountered in Altera. In addition to being able to pull off Raven's sword combos, they can also use Power Assault and Charged Bolt - Hedgehog in the same style whenever they have the appropriate amount of mana. Unlike the normal Bloody Spear Glitters, these Glitters have a lot of HP and appear early on in the dungeon. | This monster is a General Monster within the Secret Dungeon. |

|
Awakened Bloody Sniper Glitter - Unlike the Bloody Glitter Sniper, these archers will be wearing green armor. These archers are now stronger and are able to use Rena's pre-rebalance combos of firing arrows. In addition to being able to shoot arrows like Rena, they can also use Assault Kick and Perfect Storm in the same style whenever they have the appropriate amount of mana. Unlike the normal Bloody Sniper Glitters, these Glitters have a lot of HP and appear early on in the dungeon. | This monster is a General Monster within the Secret Dungeon. |

|
Awakened Bloody Magic Glitter - Instead of shooting ghosts from their wands, they can shoot fireballs in the same method as Aisha. In addition to being able to shoot fireballs like Aisha, they can also use Chain Fireball and Gust Screw in the same style whenever they have the appropriate amount of mana. Unlike the normal Bloody Magic Glitters, these Glitters have a lot of HP and appear early on in the dungeon. | This monster is a General Monster within the Secret Dungeon.
|
Player Potions
As you progress through the dungeon, you will encounter various cauldrons filled with potions. If you destroy them, you will receive the effects based off of what potion you just destroyed.
- Giant Brew: Your character size will increase substantially (and so do your attacks) and you will receive a 100% critical hit buff for its duration.
- Although the effects of the potions normally disappear after the room in which they're acquired is cleared, if an Infinity Sword uses Phantom Sword while the potion is active, the Sword maintains the increased size afterward.
- Optical Brew: Your character will have the ability to instantly kill enemies, when you touch them or hit them (except for Crazy Puppet/Joaquin's Hallucination) for its duration.
- Mana Brew: Your character will gain massive mana regeneration for its duration.
Mob Potions
Most Bloody Glitter monsters (Except Bloody Glitter Bomber) are capable of drinking potions whenever their health reaches about 60%. In Luto Mode, they will drink their potions at 70% HP. After drinking their potions, they will receive various effects.
-Red Smoke - Increasing their size and 100% critical chance.
-Yellow Smoke - Granting them super-armored status.
-Blue Smoke - Increasing their mana regeneration rate.
- They will have 90% damage reduction and super armor when they are drinking a potion but this can be prevented by using a launching attack or skill (getting Freeze or Petrified can work too to prevent drinking a Potion) just as they would normally drink a potion. Sometimes they will gain the effect of the potion anyways when launched, though the animation for drinking the potion will still be skipped.
- As you progress through the dungeon, you will re-encounter previous opponents that will try to stop you. They only appear in the background, meaning you cannot attack them or stop them from attacking.
| Obstacles Image | Obstacles Description |
|---|---|

|
Crazy Puppet - Will ignite a small fire on the field that burns anyone within. |

|
Spriggan - Will occasionally execute a Dark Energy Splash from underneath, which does substantial damage. |

|
Uno Hound - Will shoot lasers with its eyes across the field and back, potentially dragging your character across the field while dealing substantial damage. |

|
Joaquin - Will create obstacles that do damage and block your path. He can throw Puppet Stones onto the field and create portals to uplift buildings from the ground or drop them from the air. |

|
Demoniac Cannon - This is a same variant of the Demoniac Cannon that you have encountered throughout Velder.
|
| Monster Image | Boss Description | Boss Moves | |||||||||||||
|---|---|---|---|---|---|---|---|---|---|---|---|---|---|---|---|

|
Joaquin's Hallucination |
-Magic Shield: Joaquin will set up a shield that will drastically reduce all damage taken while drinking his potion to recover his health at an alarming rate.
-Hallucination: When you are in a party, Joaquin will randomly debuff one of the characters in your group. All attacks that the debuffed character makes will damage their teammates as well, including Special Actives. It is very possible to kill your own teammates while you are suffering from the debuff's effects.
-Dwarf: Joaquin will drink a potion and after flexing, he will release ghosts in all directions from his body, potentially dealing high damage. If you are standing close to him when he uses this it is possible to get hit by multiple ghosts. After the ghosts move off-screen, Joaquin will be minimized, therefore reducing his hitbox and making attacks difficult to use. Additionally he will gain super armor, 100% critical rate buff, and he will not possess a collision hitbox causing players to pass through him for the duration. This skill lasts for approximately 30 seconds.
-Thunderstorm: Joaquin will release several clouds in the air which will regularly shoot lightning at intervals, an electric effect will appear in the clouds over the player if this has targeted them. This move can be avoided if you move far away.
-Thunder: Joaquin can create smaller clouds in the air that will shoot a single bolt of lightning that can inflict status ailments such as Curse, Burn, Poison, and Confusion.
-Potion Fling: In the same style as the Arc Glitter Alchemists, Joaquin will throw a potion at you to create a cloud that can inflict various status ailments.
Other Information
| |||||||||||||
| Icon | Name | Stats | Set Bonus |
|---|---|---|---|
 |
Glitter Berserker Optical Lens | Lv. 75 Face Accessory (Middle): [Unidentified * ?] |
2-Piece Effect:
4-Piece Effect:
5-Piece Effect:
|
 |
Glitter Berserker Top Piece | Lv. 75 Top Piece: [Unidentified * ?] | |
 |
Glitter Berserker Bottom Piece | Lv. 75 Bottom Piece: [Unidentified * ?] | |
 |
Glitter Berserker Gloves | Lv. 75 Gloves: [Unidentified * ?] | |
 |
Glitter Berserker Shoes | Lv. 75 Shoes: [Unidentified * ?] | |
 |
Glitter Berserker Weapon | Lv. 75 Weapon: [Unidentified * ?] |


-
Old Dungeon Button of 6-X.

| Server | Name | Translation |
|---|---|---|
| 환각의 벨더 | Velder's Hallucinations | |
| 秘境班德 | Belder's Fam | |
| 拜德幻境 | Velder's Hallucination | |
| Halluzinationen in Belder | Hallucinations in Belder | |
| Alucinaciones en Bélder | Hallucinations in Belder | |
| Hallucinations à Belder | Hallucinations in Belder | |
| Allucinazioni a Belder | Hallucinations in Belder | |
| Halucynacje w Belder | Hallucinations in Belder | |
| Hallucinations in Belder | ||
| Alucinação de Velder | Velder's Hallucination | |