Magmanta's Cave: Difference between revisions
Gameboy224 (talk | contribs) No edit summary |
Gameboy224 (talk | contribs) No edit summary |
||
| Line 46: | Line 46: | ||
| Mob=<span style="display:none">{{</span> | | Mob=<span style="display:none">{{</span> | ||
|[[File:Shadow_Port_Walker.jpg|60px]] | |[[File:Shadow_Port_Walker.jpg|60px]] | ||
|'''Shadow Port Walker''' - This is an stronger variant of the '''Shadow Walker''' that you have encountered in previous Hamel dungeons. | |'''Shadow Port Walker''' - This is an stronger variant of the '''Shadow Walker''' that you have encountered in previous Hamel dungeons. | ||
| | |||
-''Claw Attack:'' A basic 3 hit combo with their claws. | |||
|- | |- | ||
|[[File:Shadow_Port_Trickster.jpg|60px]] | |[[File:Shadow_Port_Trickster.jpg|60px]] | ||
|'''Shadow Port Trickster''' - A Shadow monster | |'''Shadow Port Trickster''' - A large Shadow monster with advanced magical capabilities. | ||
| | |||
-''Wind Totem:'' A blue totem that creates a sphere of wind that increases the stats of the mobs. | |||
<br> | |||
-''Fire Totem:'' A red totem that emits homing fireballs. | |||
<br> | |||
-''Lightning Bolt:'' The Trickster shoots a bolt of lightning out of his hands. | |||
|- | |- | ||
|[[File:ShadowPortCharger_Head.jpg|60px]] | |[[File:ShadowPortCharger_Head.jpg|60px]] | ||
|'''Shadow Port Charger''' - This is an stronger variant of the '''Shadow Charger''' that you have encountered in previous Hamel dungeons. | |'''Shadow Port Charger''' - This is an stronger variant of the '''Shadow Charger''' that you have encountered in previous Hamel dungeons. | ||
| | |||
-''Charge:'' It will run forward, damaging any players within its path. | |||
<br> | |||
-''Grab:'' It can also grab onto any players, immobilizing them. You can escape from their grasp by rapidly tapping the left and right arrow keys. | |||
|- | |- | ||
|[[File:ShadowPortDefender_Head.jpg|60px]] | |[[File:ShadowPortDefender_Head.jpg|60px]] | ||
|'''Shadow Port Defender''' - This is an stronger variant of the '''Shadow Defender''' that you have encountered in previous Hamel dungeons. | |'''Shadow Port Defender''' - This is an stronger variant of the '''Shadow Defender''' that you have encountered in previous Hamel dungeons. | ||
| | |||
-''Shadow Spear:'' It will launch spears in and arc towards you. When a player gets hit by the spears, they will be Cursed and will gradually lose mana over time. | |||
<br> | |||
-''Dark Aura:'' Emit a dark aura that increases the defense of monsters within range. It will also cause Shadow Charger's Grab to drain HP and MP at a significant rate. | |||
|- | |- | ||
|[[File:ShadowPortSniper_Head.jpg|60px]] | |[[File:ShadowPortSniper_Head.jpg|60px]] | ||
|'''Shadow Port Sniper''' - This is an stronger variant of the '''Shadow Sniper''' that you have encountered in previous Hamel dungeons. The Sniper | |'''Shadow Port Sniper''' - This is an stronger variant of the '''Shadow Sniper''' that you have encountered in previous Hamel dungeons. | ||
| | |||
-''Aimed Light Beam:'' Slowly charges up their laser and then fires it. The laser will travel across the entire stage. Unlike the normal '''Shadow Sniper''' the laser can be aimed in all directions including into the back and foreground. | |||
|- | |- | ||
|[[File:Hamel-blood-linker.jpg|60px]] | |[[File:Hamel-blood-linker.jpg|60px]] | ||
|'''Blood Linker''' - This is | |'''Blood Linker''' - This is a red alternate form of the Shadow Linker. | ||
| | |||
-''Blood Link:'' The Blood Linker will link itself with a player eating away at their health gradually. | |||
|- | |- | ||
|[[File:Hamel-mana-linker.jpg|60px]] | |[[File:Hamel-mana-linker.jpg|60px]] | ||
|'''Mana Linker''' - This is | |'''Mana Linker''' - This is a blue alternate form of the Shadow Linker. | ||
| | |||
-''Mana Link:'' The Mana Linker will link itself with a player eating away at their mana gradually. | |||
|- | |- | ||
|[[File:Hamel-shadow-linker.jpg|60px]] | |[[File:Hamel-shadow-linker.jpg|60px]] | ||
|'''Shadow Linker''' - A small Shadow monster that can Soul Link just like [[ | |'''Shadow Linker''' - A small Shadow monster that can Soul Link just like [[7-1| Shadow Master]]. | ||
| | |||
-''Link:'' The Shadow Linker will link itself with a player causing them to have significantly reduced movement and attack speed. | |||
|- | |- | ||
|[[File:Hagalaz_Noah%27s_Grave.jpg|60px]] | |[[File:Hagalaz_Noah%27s_Grave.jpg|60px]] | ||
|'''Hagaluz''' - A spirit | |'''Hagaluz''' - A spirit much like Laguz and Iz with power of ice and darkness. | ||
| | |||
-''Ice Saw:'' She will create a saw of ice in front of her inflicting [[Status Effects|Frostbite]]. | |||
<br> | |||
-''Ice Daggers:'' She will spew ice dagger in front of her inflicting [[Status Effects|Frostbite]]. | |||
<br> | |||
-''Ice Trap:'' She can also summon several '''Ice Traps'''. Contact with this aura will induce [[Status Effects|Curse]]. | |||
<br> | |||
-''Self-Destruct:'' When she dies, a dark eye aura envelops her. | |||
|- | |- | ||
|[[File:Spider_Cocoon.jpg|60px]] | |[[File:Spider_Cocoon.jpg|60px]] | ||
|'''Spider Cocoons''' - In this dungeon, you will encounter cocoons. You are required to destroy them to advance through the dungeon. After destroying them, either a '''Mantaray''' or '''Mantatres''' will spawn or you will free a '''Missing Red Knight'''. | |'''Spider Cocoons''' - In this dungeon, you will encounter cocoons. You are required to destroy them to advance through the dungeon. After destroying them, either a '''Mantaray''' or '''Mantatres''' will spawn or you will free a '''Missing Red Knight'''. | ||
| | |||
''none'' | |||
|- | |- | ||
|[[File:Mantares_Head.jpg|60px]] | |[[File:Mantares_Head.jpg|60px]] | ||
|'''Mantares''' - This is one of the two spiders that you will encounter. It will attack by spewing acid from their mouth that will poison you while hitting you multiple times. | |'''Mantares''' - This is one of the two spiders that you will encounter. It will attack by spewing acid from their mouth that will poison you while hitting you multiple times. | ||
| | |||
-''Slash:'' These spiders can slash with their legs. | |||
<br> | |||
-''Lunge:'' These spiders are able to lunge attack with their entire body. | |||
<br> | |||
-''Acid Spit:'' These spiders are able to spew acid out of their mouths. | |||
|- | |- | ||
|[[File:Mantaray.jpg|60px]] | |[[File:Mantaray.jpg|60px]] | ||
|'''Mantaray''' - This is the smaller and weaker spider that you will encounter in this dungeon. They will attack mainly with their | |'''Mantaray''' - This is the smaller and weaker spider that you will encounter in this dungeon. They will attack mainly with their legs. | ||
| | |||
-''Slash:'' These spiders can slash with their legs. | |||
<br> | |||
-''Lunge:'' These spiders are able to lunge attack with their entire body. | |||
<span style="display:none">}}</span> | <span style="display:none">}}</span> | ||
| MiniBoss=<span style="display:none">{{</span> | | MiniBoss=<span style="display:none">{{</span> | ||
Revision as of 08:08, 8 November 2015

Magmanta's Cave
| “ | The secret passage that leads to the entrance of the Temple of Frozen Water. Magmanta's Cave has a giant monster glaring at the adventurers.
|
” |


| Ally Image | Ally Description | Ally Moves |
|---|---|---|

|
Missing Red Knight (Lord Knight) - These knights were sent to investigate the cave but were captured by the spiders in the process and sealed in cocoons. If you free them from the cocoons, they will help you fight against the enemies in the dungeon. This Red Knight is capable of using Lord Knight combos and some of his skills. |
-Sonic Blade: They can use Sonic Blade exactly the same way that Elsword can.
|
|
|
Missing Red Knight (Rune Slayer) - These knights were sent to investigate the cave but were captured by the spiders in the process and sealed in cocoons. If you free them from the cocoons, they will help you fight against the enemies in the dungeon. This Red Knight is capable of using Rune Slayer combos and some of his skills. |
-Rising Slash: They can use Rising Slash exactly the same way that Elsword can.
|
| Monster Image | Monster Description | Monster Moves |
|---|---|---|

|
Shadow Port Walker - This is an stronger variant of the Shadow Walker that you have encountered in previous Hamel dungeons. |
-Claw Attack: A basic 3 hit combo with their claws. |

|
Shadow Port Trickster - A large Shadow monster with advanced magical capabilities. |
-Wind Totem: A blue totem that creates a sphere of wind that increases the stats of the mobs.
|

|
Shadow Port Charger - This is an stronger variant of the Shadow Charger that you have encountered in previous Hamel dungeons. |
-Charge: It will run forward, damaging any players within its path.
|

|
Shadow Port Defender - This is an stronger variant of the Shadow Defender that you have encountered in previous Hamel dungeons. |
-Shadow Spear: It will launch spears in and arc towards you. When a player gets hit by the spears, they will be Cursed and will gradually lose mana over time.
|

|
Shadow Port Sniper - This is an stronger variant of the Shadow Sniper that you have encountered in previous Hamel dungeons. |
-Aimed Light Beam: Slowly charges up their laser and then fires it. The laser will travel across the entire stage. Unlike the normal Shadow Sniper the laser can be aimed in all directions including into the back and foreground. |

|
Blood Linker - This is a red alternate form of the Shadow Linker. |
-Blood Link: The Blood Linker will link itself with a player eating away at their health gradually. |

|
Mana Linker - This is a blue alternate form of the Shadow Linker. |
-Mana Link: The Mana Linker will link itself with a player eating away at their mana gradually. |

|
Shadow Linker - A small Shadow monster that can Soul Link just like Shadow Master. |
-Link: The Shadow Linker will link itself with a player causing them to have significantly reduced movement and attack speed. |

|
Hagaluz - A spirit much like Laguz and Iz with power of ice and darkness. |
-Ice Saw: She will create a saw of ice in front of her inflicting Frostbite.
|

|
Spider Cocoons - In this dungeon, you will encounter cocoons. You are required to destroy them to advance through the dungeon. After destroying them, either a Mantaray or Mantatres will spawn or you will free a Missing Red Knight. |
none |

|
Mantares - This is one of the two spiders that you will encounter. It will attack by spewing acid from their mouth that will poison you while hitting you multiple times. |
-Slash: These spiders can slash with their legs.
|

|
Mantaray - This is the smaller and weaker spider that you will encounter in this dungeon. They will attack mainly with their legs. |
-Slash: These spiders can slash with their legs.
|
| Monster Image | Boss Description | Boss Moves |
|---|---|---|

|
Giant Hammer Bobosse |
-Smash: Bobosse will simply smash his hammer once onto the ground.
|
| Obstacles Image | Obstacles Description |
|---|---|

|
Black Flower - Black Flowers are plants located on the bottom of various platforms. They will attack by emitting poison gas downwards to poison any players directly under them. After killing one, they will emit a toxic cloud to poison any players that are close to it. |
| Pitfalls - A gaping hole in the ground, falling down one of these will result in a percent loss in HP. | |

|
Ice Rock - Only appears at the passageway to Magmanta's chamber. Falls as players approach.
|

|
Portal - This portal doesn't attack you, it transports you between the front layer to the back layer where Shadow Port Snipers are trying to snipe you from.
|
| Monster Image | Boss Description | Boss Moves |
|---|---|---|

|
Magmanta |
-Cripple Cut: Magmanta rises up into the air and crashes into the ground near the player. Can be avoided by waiting in one spot until the monster sign appears above the player's head, and moving quickly out of range.
-Lunge: Magmanta will pull back slightly then jump forwards trying to crush anything in front of it.
-While Magmanta is on the other side of the map, being on the left upper platform will make her ignore the players, like this she won't spit poison.
|
- Bobosse Skinned Sword
- Bobosse Devil Punisher
- Bobosse Claymore
- Magmanta's Arachni
- Magmanta's Spider Drone
- Magmantia
- Spider Skull
| Image | Name | Boss | Character | Stats |
|---|---|---|---|---|
 |
Lv58 Great Sword: Physical Attack +3701 Magical Attack +3701 [Unidentified * ?] [Unidentified * ?] Critical +5% Ice Element Resistance +40 |


-

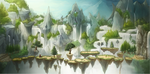
Water Temple Entrance Concept Art
-
Water Temple Entrance Concept Art 2
-
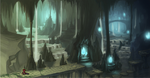
Water Temple Entrance Concept Art 3


- Strangely, despite Magmanta's massive size and weight, it does not fracture the ice when it uses Crippling Cut and does not fall into the water during Prepare Attack. This is likely because its weight is spread over 6 legs.
- There is a glitch where, if you awaken right before teleporting into Magmanta's room, only your weapon (and tails if you're Ara) will appear, and you will be invincible against all attacks. However, you can still attack in this state.
- This state of invincibility and avatar invisibility will wear off once your awakening mode ends.
| Server | Name | Translation |
|---|---|---|
| 마그만타의 동굴 | Magmanta's Cave | |
| 瑪丹瑪朵洞穴 | Magmanta's Cave | |
| 玛丹玛朵洞窟 | Magmanta's Cave | |
| Magmantas Schlupfwinkel | Magmanta's Hideout | |
| Guarida de Magmanta | Magmanta's Lair | |
| Le repaire de Magmanta | Magmanta's Lair | |
| Nascondiglio di Magmanta | Magmanta's Hideout | |
| Kryjówka Magmanty | Magmanta's Hideout | |
| Magmanta's Lair | ||
| Caverna de Magmanta | Magmanta's Cave | |