Henir's Time and Space/Season 3: Difference between revisions
IceSoulMOG (talk | contribs) No edit summary |
IceSoulMOG (talk | contribs) No edit summary |
||
| Line 75: | Line 75: | ||
| Color0={{ColorSel|Misc}} | | Color0={{ColorSel|Misc}} | ||
| Title0=Boss Set List | | Title0=Boss Set List | ||
}} | |||
{{Section | |||
| Color0={{ColorSel|Village|3}} | |||
| Title0=Bethma Selection | |||
| Content0=<span style="display:none">{{</span> | |||
*Berauk (x1), Dark Berauk (x1), Kayak the Shaman (x1)<br/> | |||
<span style="display:none">}}</span> | |||
}} | }} | ||
{{Section | {{Section | ||
| Line 80: | Line 87: | ||
| Title0=Altera Selection | | Title0=Altera Selection | ||
| Content0=<span style="display:none">{{</span> | | Content0=<span style="display:none">{{</span> | ||
*Wally No. 8 MK2, Crow Rider (x2)<br/> | *Wally No. 8 MK2 (x1), Crow Rider (x2)<br/> | ||
<span style="display:none">}}</span> | <span style="display:none">}}</span> | ||
}} | }} | ||
| Line 156: | Line 163: | ||
*Enraged Manifestation (x1)<br/> | *Enraged Manifestation (x1)<br/> | ||
*Form of Mutated Demonic Energy (x1)<br/> | *Form of Mutated Demonic Energy (x1)<br/> | ||
<span style="display:none">}}</span> | <span style="display:none">}}</span> | ||
}} | }} | ||
| Line 232: | Line 230: | ||
| Title0=Rewards | | Title0=Rewards | ||
| Content0=<span style="display:none">{{</span> | | Content0=<span style="display:none">{{</span> | ||
After completing a run, you will receive Time and Space | After completing a run, you will receive Time and Space Crystals. These will be used for crafting Henir equipment or exchanging for other rewards at Glave. | ||
<br> | <br> | ||
In addition, certain titles can be obtained from completing Henir on Challenge mode. When you play in Challenge mode and quit the dungeon at the rest areas, you and your playtime will be placed on the leaderboards. Titles will only be awarded to Ranks 1 through 100 with the exception of Monthly Ranking, which will only be rewarded to Ranks 1 through 10. | In addition, certain titles can be obtained from completing Henir on Challenge mode. When you play in Challenge mode and quit the dungeon at the rest areas, you and your playtime will be placed on the leaderboards. Titles will only be awarded to Ranks 1 through 100 with the exception of Monthly Ranking, which will only be rewarded to Ranks 1 through 10. | ||
<br/> | <br/> | ||
{ | {| cellspacing="0" cellpadding="5" border="1" width="30%" style="border-collapse: collapse; text-align: center" | ||
|- | |||
! rowspan=2 | Area !! colspan=2 | Reward for Exiting !! colspan=2 | Reward for Failing | |||
|- | |||
| | ! width=54 | Material !! width=54 | Amount !! width=54 | Material !! width=54 | Amount | ||
|- | |||
| Stage 1 || [[File:Dunno.png|54px]] || 4 || [[File:Dunno.png|54px]] || 0 || Stage 16 || [[File:Dunno.png|54px]] || 54 || [[File:Dunno.png|54px]] || 50 | |||
! rowspan=2 | |- | ||
| Stage 2 || [[File:Dunno.png|54px]] || 7 || [[File:Dunno.png|54px]] || 4 || Stage 17 || [[File:Dunno.png|54px]] || 57 || [[File:Dunno.png|54px]] || 54 | |||
! width=54 | |- | ||
| Stage 3 || [[File:Dunno.png|54px]] || 10 || [[File:Dunno.png|54px]] || 7 || Stage 18 || [[File:Dunno.png|54px]] || 60 || [[File:Dunno.png|54px]] || 57 | |||
|- | |||
| Stage 4 || [[File:Dunno.png|54px]] || 13 || [[File:Dunno.png|54px]] || 10 || Stage 19 || [[File:Dunno.png|54px]] || 63 || [[File:Dunno.png|54px]] || 60 | |||
|- | |||
| Stage 5 || [[File:Dunno.png|54px]] || 17 || [[File:Dunno.png|54px]] || 13 || Stage 20 || [[File:Dunno.png|54px]] || 67 || [[File:Dunno.png|54px]] || 63 | |||
|- | |||
| Stage 6 || [[File:Dunno.png|54px]] || 21 || [[File:Dunno.png|54px]] || 17 || Stage 21 || [[File:Dunno.png|54px]] || 71 || [[File:Dunno.png|54px]] || 67 | |||
|- | |||
| Stage 7 || [[File:Dunno.png|54px]] || 25 || [[File:Dunno.png|54px]] || 21 || Stage 22 || [[File:Dunno.png|54px]] || 75 || [[File:Dunno.png|54px]] || 71 | |||
|- | |||
| Stage 8 || [[File:Dunno.png|54px]] || 29 || [[File:Dunno.png|54px]] || 25 || Stage 23 || [[File:Dunno.png|54px]] || 100 || [[File:Dunno.png|54px]] || 75 | |||
|- | |||
| Stage 9 || [[File:Dunno.png|54px]] || 32 || [[File:Dunno.png|54px]] || 29 || Stage 24 || [[File:Dunno.png|54px]] || 100 || [[File:Dunno.png|54px]] || 100 | |||
| | |- | ||
| | | Stage 10 || [[File:Dunno.png|54px]] || 35 || [[File:Dunno.png|54px]] || 32 | ||
|- | |||
| Stage 11 || [[File:Dunno.png|54px]] || 38 || [[File:Dunno.png|54px]] || 35 | |||
|- | |||
| Stage 12 || [[File:Dunno.png|54px]] || 42 || [[File:Dunno.png|54px]] || 38 | |||
|- | |||
| Stage 13 || [[File:Dunno.png|54px]] || 46 || [[File:Dunno.png|54px]] || 42 | |||
|- | |||
| Stage 14 || [[File:Dunno.png|54px]] || 50 || [[File:Dunno.png|54px]] || 46 | |||
|- | |||
| Stage 15 || [[File:Dunno.png|54px]] || 50 || [[File:Dunno.png|54px]] || 50 | |||
|} | |||
<span style="display:none">}}</span> | |||
}} | }} | ||
{{Section | {{Section | ||
| Line 297: | Line 277: | ||
| Title0=Henir Equipment | | Title0=Henir Equipment | ||
| Content0={{:Henir Equipment/Lv80}} | | Content0={{:Henir Equipment/Lv80}} | ||
}} | }} | ||
{{Section | {{Section | ||
Revision as of 03:01, 10 November 2016


Henir's Time and Space
| “ | Henir's Time and Space. Time and Space is in complete chaos. A dangerous trial awaits us...
|
” |
| Description |
|---|
| Originally Ymir's Time and Space, William's Time and Space. Dimensional time and space where a genius magician is serving an eternal punishment. This dungeon mode allows you to fight the major bosses in Elsword in a boss rush style. Through this mode, you can collect Pieces of Time and Space, which you can exchange Glave for special items and/or equipment. Henir's Spacetime may be attempted as much as the player wishes, but they can only receive items for 3 runs per day.
|

|
|
| Story |
|---|
|
A phenomenon called Henir's Time and Space lies in a temple called Seven Tower, where sages were known to dwell. The land it stands on was discovered in the olden days. This discovery brought about the emergence of magical skills, and led to the temple being built. Legend has it that the god Henir endured Ragnarok, and afterwards created a place where there is no limitation of time and space. Here, he is able to see the rise and fall of the world. Should you reach this place, by Henir's force, you are bound to face the enemies you have met in the past and those you are destined to meet in the future. It has been said that a person overcoming this test can meet Henir and acquire an immense power. However, as the power of El began to decrease, the entrance of Henir's Time and Space has suddenly appeared in several places. Elsword and the rest of the gang decide to enter this mysterious dungeon in attempts of gaining the legendary power and using it to take back the missing El. |
| Map Layout |
|---|
|
Consists of 24 consecutive boss rooms with one rest area after stage 15. Bosses are now selected randomly in any order each week(?) with secret dungeon bosses in room 2, 17 and 20. |
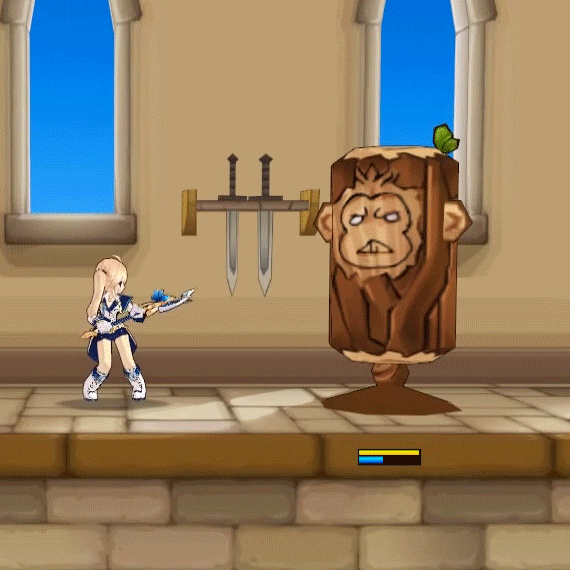
| Boss Set List |
|---|
| Bethma Selection |
|---|
|
| Altera Selection |
|---|
|
| Feita Selection |
|---|
|
| Velder Selection |
|---|
|
| Hamel Selection |
|---|
|
| Sander Selection |
|---|
|
| Lanox Selection |
|---|
|
| Elysion Selection |
|---|
|
| Secret Dungeon Selection |
|---|
|
| Rest Area Buffs |
|---|
|
Rest Areas will restore a fixed percentage of HP and MP. Each rest area after the first will restore a bit less HP\MP than the previous one. Rest Areas will also have a chance of giving every player a special buff at random as follows:
Note
|

| Guide for Players | ||||||||||||||||||||||||||||||||||||||||||||||||||||
|---|---|---|---|---|---|---|---|---|---|---|---|---|---|---|---|---|---|---|---|---|---|---|---|---|---|---|---|---|---|---|---|---|---|---|---|---|---|---|---|---|---|---|---|---|---|---|---|---|---|---|---|---|
BasicsBe equipped to your best ability.
In Henir there are multiples of most enemies. Generally as a first priority, you would want to group the enemies if conveniently possible.
Be considerate of your party mates.
Have an understanding of how each boss fights before challenging Henir's Time and Space.
|
||||||||||||||||||||||||||||||||||||||||||||||||||||
| Rewards | |||||||||||||||||||||||||||||||||||||||||||||||||||||||||||||||||||||||||||||||||||||||||||||||||||||||||||||||||||||||||||||||||
|---|---|---|---|---|---|---|---|---|---|---|---|---|---|---|---|---|---|---|---|---|---|---|---|---|---|---|---|---|---|---|---|---|---|---|---|---|---|---|---|---|---|---|---|---|---|---|---|---|---|---|---|---|---|---|---|---|---|---|---|---|---|---|---|---|---|---|---|---|---|---|---|---|---|---|---|---|---|---|---|---|---|---|---|---|---|---|---|---|---|---|---|---|---|---|---|---|---|---|---|---|---|---|---|---|---|---|---|---|---|---|---|---|---|---|---|---|---|---|---|---|---|---|---|---|---|---|---|---|---|
|
After completing a run, you will receive Time and Space Crystals. These will be used for crafting Henir equipment or exchanging for other rewards at Glave.
|
|||||||||||||||||||||||||||||||||||||||||||||||||||||||||||||||||||||||||||||||||||||||||||||||||||||||||||||||||||||||||||||||||

| Henir Equipment | ||||||||||||||||||||||
|---|---|---|---|---|---|---|---|---|---|---|---|---|---|---|---|---|---|---|---|---|---|---|
{{
|


| Videos |
|---|
|
|
| BGM |
|---|
| Lobby - space_henir |
| Possible Bug/Glitches |
|---|
|
This is a list of possible bugs/glitches that might be encountered inside Henir's Time and Space:
|
| Alternative Names | |||||||||||||||||||||||||||||||||
|---|---|---|---|---|---|---|---|---|---|---|---|---|---|---|---|---|---|---|---|---|---|---|---|---|---|---|---|---|---|---|---|---|---|
|
|||||||||||||||||||||||||||||||||